Section 01 · Setup
Setting up the wallet adapter in a Next.js App Router project
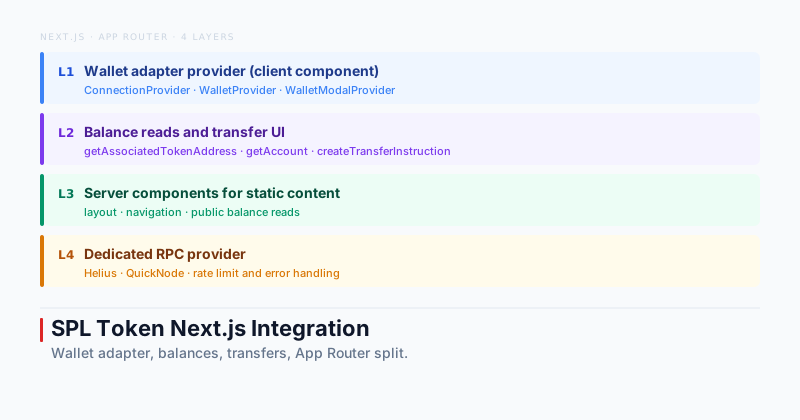
Wallet adapter is a set of React packages that standardize how your app talks to browser wallet extensions like Phantom or Solflare, and it needs a specific provider tree wrapping any component that uses its hooks.
Quick answer
In one sentence: You integrate an SPL token into Next.js by wrapping the client side of your app in the wallet adapter providers, then using web3.js and the spl token library inside client components to read balances and send transfer or mint transactions through the connected wallet.
Install the core packages.
npm install @solana/wallet-adapter-react @solana/wallet-adapter-react-ui @solana/wallet-adapter-wallets @solana/web3.js @solana/spl-tokenThe provider tree needs three layers: a connection to an RPC endpoint, a wallet context that tracks which wallet is connected, and a modal provider for the connect button UI. This tree uses React context and browser only APIs, which means it cannot render on the server, so it belongs in its own client component.
"use client";

import { useMemo } from "react";
import {
  ConnectionProvider,
  WalletProvider,
} from "@solana/wallet-adapter-react";
import { WalletModalProvider } from "@solana/wallet-adapter-react-ui";
import { PhantomWalletAdapter } from "@solana/wallet-adapter-wallets";
import "@solana/wallet-adapter-react-ui/styles.css";

export function WalletContextProvider({ children }: { children: React.ReactNode }) {
  const endpoint = process.env.NEXT_PUBLIC_RPC_ENDPOINT!;
  const wallets = useMemo(() => [new PhantomWalletAdapter()], []);

  return (
    <ConnectionProvider endpoint={endpoint}>
      <WalletProvider wallets={wallets} autoConnect>
        <WalletModalProvider>{children}</WalletModalProvider>
      </WalletProvider>
    </ConnectionProvider>
  );
}
Import this into your root layout and wrap the page content with it. The layout file itself can stay a server component; only this provider file needs the directive, because Next.js only requires use client at the boundary where client only behavior starts, not at every ancestor above it.
import { WalletContextProvider } from "./wallet-context-provider";

export default function RootLayout({ children }: { children: React.ReactNode }) {
  return (
    <html lang="en">
      <body>
        <WalletContextProvider>{children}</WalletContextProvider>
      </body>
    </html>
  );
}
A common App Router mistake
Marking the entire layout file as a client component to make the wallet provider work is unnecessary and expensive. It forces every page under that layout to skip server rendering. Isolate the provider in its own small client file and keep the layout itself a server component.
Section 02 · Server versus client
Which parts of the app actually need to be client components?
The App Router pushes you to decide this explicitly for every file, and getting it wrong either breaks wallet functionality or silently ships more JavaScript to the browser than the page needs.
| Concern | Where it belongs | Why |
|---|---|---|
| Wallet connect button and modal | Client component | Uses browser wallet extension APIs and React context from wallet adapter |
| useWallet and useConnection hooks | Client component | Both hooks read from context providers that only exist in the browser |
| Sending a transfer or mint transaction | Client component | Needs the connected wallet to sign, which only happens in the browser |
| Reading a public balance unrelated to the connected wallet | Server component (optional) | Can be fetched at request time with a plain RPC call, no wallet needed |
| Static page content, layout, navigation | Server component | No wallet or browser API dependency at all |
The practical pattern most pages end up with is a server component page that renders static structure, importing one clearly named client component, often called something like TokenDashboard or TransferForm, that owns everything wallet related. Keeping that boundary narrow means the rest of the page still benefits from server rendering and a smaller client bundle.
Section 03 · Reading balances
How do you read an SPL token balance in a React component?
Reading a balance means finding the associated token account for the connected wallet and the mint you care about, then reading its amount, and both steps use the same connection object the wallet adapter already gives you.
"use client";

import { useEffect, useState } from "react";
import { useConnection, useWallet } from "@solana/wallet-adapter-react";
import { getAssociatedTokenAddress, getAccount } from "@solana/spl-token";
import { PublicKey } from "@solana/web3.js";

const MINT = new PublicKey(process.env.NEXT_PUBLIC_TOKEN_MINT!);

export function TokenBalance() {
  const { connection } = useConnection();
  const { publicKey } = useWallet();
  const [balance, setBalance] = useState<string | null>(null);
  const [error, setError] = useState<string | null>(null);

  useEffect(() => {
    if (!publicKey) {
      setBalance(null);
      return;
    }

    async function loadBalance() {
      try {
        const ata = await getAssociatedTokenAddress(MINT, publicKey);
        const account = await getAccount(connection, ata);
        setBalance(account.amount.toString());
        setError(null);
      } catch (err) {
        setBalance("0");
        setError("No token account found for this wallet yet.");
      }
    }

    loadBalance();
  }, [publicKey, connection]);

  if (!publicKey) return <p>Connect a wallet to see your balance.</p>;
  if (error) return <p>{error}</p>;
  return <p>Balance: {balance}</p>;
}
getAccount throws when the account does not exist, which is the normal case for a wallet that has never held this token, not a bug. Catching that specific case and showing a clear message beats letting the error bubble up as a stack trace, since a first time holder is one of the most common users your app will see.
Section 04 · Transfers
Building a transfer and mint UI
A transfer needs the sender's connected wallet to sign, the recipient's associated token account to exist or be created, and the instruction built from the spl token library rather than a raw transaction.
"use client";

import { useState } from "react";
import { useConnection, useWallet } from "@solana/wallet-adapter-react";
import {
  getOrCreateAssociatedTokenAccount,
  createTransferInstruction,
} from "@solana/spl-token";
import { Transaction, PublicKey } from "@solana/web3.js";

const MINT = new PublicKey(process.env.NEXT_PUBLIC_TOKEN_MINT!);

export function TransferForm() {
  const { connection } = useConnection();
  const { publicKey, sendTransaction } = useWallet();
  const [status, setStatus] = useState("");

  async function handleTransfer(recipientAddress: string, amount: number) {
    if (!publicKey) {
      setStatus("Connect your wallet first.");
      return;
    }

    try {
      const recipient = new PublicKey(recipientAddress);

      const senderAta = await getOrCreateAssociatedTokenAccount(
        connection,
        publicKey,
        MINT,
        publicKey
      );
      const recipientAta = await getOrCreateAssociatedTokenAccount(
        connection,
        publicKey,
        MINT,
        recipient
      );

      const transaction = new Transaction().add(
        createTransferInstruction(
          senderAta.address,
          recipientAta.address,
          publicKey,
          amount
        )
      );

      const signature = await sendTransaction(transaction, connection);
      await connection.confirmTransaction(signature, "confirmed");
      setStatus("Transfer confirmed.");
    } catch (err: any) {
      if (err.message?.includes("insufficient")) {
        setStatus("Not enough SOL to cover the transaction and account rent.");
      } else if (err.message?.includes("429")) {
        setStatus("The RPC endpoint is rate limiting requests. Try again shortly.");
      } else {
        setStatus("Transfer failed. Check the recipient address and try again.");
      }
    }
  }

  return null;
}
Two details matter here that a lot of first attempts skip. First, getOrCreateAssociatedTokenAccount for the recipient will create their ATA if it does not exist, and someone has to pay the small rent cost for that creation, which by default in this pattern is the sender through sendTransaction. Second, sendTransaction from the wallet adapter hook is what triggers the wallet extension's approval popup, so the user always sees exactly what they are signing before it goes to the network.
Section 05 · RPC providers
Which RPC provider should you use for a production Solana app?
The public Solana RPC endpoint exists for convenience and testing, not for production traffic, and every serious Next.js integration needs a dedicated provider before launch.
| Provider | Good fit for | Consideration |
|---|---|---|
| Public endpoint (api.mainnet-beta.solana.com) | Local development, quick scripts | Aggressive rate limits shared across every user of the endpoint globally |
| Helius | Production apps needing enhanced APIs like webhooks and parsed transactions | Pricing scales with request volume and enhanced feature usage |
| QuickNode | Teams wanting multi chain support alongside Solana | Similar tiered pricing, strong dashboard tooling |
| Triton or self hosted RPC | High volume applications with dedicated infrastructure budget | Highest control, highest operational overhead |
Set the RPC endpoint through an environment variable, never hardcoded, so switching providers or adding a fallback endpoint does not require touching component code. Most teams start with a Helius or QuickNode free tier during development, then move to a paid tier that matches their expected transaction volume before mainnet launch.
Section 06 · Error handling
What errors should you actually handle, not just catch generically?
A single catch block that shows a generic failure message tells the user nothing useful and makes support harder. Three specific failure modes cover most of what breaks in a token integration.
Wallet not connected is the most common state your UI will be in, and it should be handled as a normal state, not an error, by disabling actions and showing a clear connect prompt rather than throwing.
Most of these failure modes trace back to the transaction and account lifecycle covered in Solana transactions explained, which is worth a look if error messages from sendTransaction or confirmTransaction still feel opaque.
Insufficient SOL for rent happens when a wallet has enough of your token conceptually but not enough SOL to pay for the associated token account creation or the transaction fee itself. The error message from the network is generic, so check for it explicitly and tell the user they need a small amount of SOL, not just your token, to complete the action.
RPC rate limiting shows up as a 429 response once real traffic hits a shared or under provisioned endpoint. Detecting this specific case and retrying with backoff, or telling the user to wait a moment, is far better than a generic transaction failed message that looks identical to a real signing failure.
If you have not yet created the token this integration is built around, the guide on creating an SPL token on Solana covers the mint setup and authority decisions this integration assumes are already made. The same wallet and RPC setup here also applies almost unchanged if you are instead reading or displaying NFTs built on the SPL token standard, since both are the same underlying account model.